
Table of Contents
- Step 1: Define Your Niche & Target Customer
- Step 2: Choose Your Product Category
- Step 3: Create Your Brand Identity
- Step 4: Find an OEM Manufacturer
- Step 5: Write (or Get Help With) a Tech Pack
- Step 6: Order Samples
- Step 7: Set Up Private Label Branding
- Step 8: Place Your First Production Order
- Step 9: Handle Shipping & Import
- Step 10: Launch & Scale
Step 1: Define Your Niche & Target Customer
Before you think about fabric weights, MOQ, or even a brand name, you need to answer one question: who exactly are you making clothes for? This sounds simple, but it's the step most new brand founders skip — and it's why so many end up with a generic product that competes on price rather than value. The clothing market is saturated at the top level, but deeply underserved at the specific level.
Niche selection is how you win. Consider the difference between "women's activewear" (a market worth $100+ billion, dominated by Nike, Lululemon, and a thousand Amazon sellers) versus "moisture-wicking gym sets for petite women who hate waistbands that roll down during deadlifts." The second one speaks directly to a real frustration. It creates a product-market fit that drives word-of-mouth organically. The same principle applies to custom soccer kits for amateur leagues, sustainable streetwear for environmentally-conscious Gen Z shoppers, or oversized hoodies designed specifically for university students in the UK.
Validating demand before you manufacture is critical. Spend time on Instagram searching hashtags related to your niche and study what content gets engagement. Browse Reddit communities like r/streetwear, r/femalefashionadvice, or sport-specific subreddits to understand real frustrations with existing products. Check Amazon bestseller lists to see what's already selling — not to copy it, but to confirm demand. Run a simple Google Forms survey in relevant Facebook Groups or Discord communities. If you can get 50 people to tell you they'd buy your product at your target price, you have proof of concept worth acting on.
The niche principle: The most successful clothing brands solve a specific problem for a specific person. "Athletic wear" is not a niche. "Moisture-wicking gym sets for petite women who hate waistbands that roll down" is a niche — and that's exactly the kind of specificity that builds loyal customers and powerful word-of-mouth without a massive advertising budget.
Step 2: Choose Your Product Category
Once you know your customer, you need to decide what to make. The most common mistake founders make is trying to launch a full range immediately — t-shirts, hoodies, joggers, shorts, and a jacket all at once. This spreads budget thin, complicates your messaging, and makes it nearly impossible to execute quality across every style. Start with one to three hero products that best solve your customer's problem. Launch them well. Validate. Then expand.
Different categories come with different complexity levels and cost implications. Hoodies and basic t-shirts are low complexity — they use standard construction techniques, have widely available fabrics, and are easiest to quality-check. Leggings and sports bras involve stretch fabrics (typically polyester-spandex blends), specialized stitching techniques (flatlock seams are standard for activewear), and require more precise measurement specifications. Outerwear like softshell jackets involves laminated fabrics, zippers, and multiple panels, making them higher complexity and higher cost. Team uniforms sit in the middle — they involve sublimation printing or embroidery but follow consistent construction patterns that experienced manufacturers handle quickly.
Here is a quick reference for what you can expect at Al Wahab Global:
| Product | Complexity | MOQ at AWG | Avg Unit Cost |
|---|---|---|---|
| Hoodies | Low | 10 pcs | $10–26 |
| Leggings | Medium | 10 pcs | $7–17 |
| Team Uniforms | Medium | 10 pcs/set | $18–48 |
| Softshell Jackets | High | 10 pcs | $18–45 |
Step 3: Create Your Brand Identity
Your brand identity is the sum of everything your customer experiences: your name, your visual design, your packaging, the feel of your labels, and the tone of your communications. Getting this right before you go into production matters because your manufacturer will be producing garments with your branding permanently attached. A woven label can't be un-sewn after 500 pieces arrive.
Start with your brand name. A good apparel brand name is short (one or two words), easy to pronounce and remember, and ideally searchable as a domain and Instagram handle. Check trademark availability in your target market before committing. Then develop your visual identity: a logo, a defined color palette (Pantone references for your manufacturer), and a consistent brand font. These elements will appear on your hang tags, website, and marketing materials, so investing time here is worthwhile even before you order your first sample.
Understanding what private label manufacturing means is important here. Private label means your brand identity is placed on products manufactured by another company — the same model used by Nike (who manufactures with Yue Yuen in Vietnam), Gymshark (who uses contract manufacturers in Southeast Asia and Pakistan), and Stone Island (who outsources production across Italy and Asia). The manufacturer's name appears nowhere on the finished product. Only your brand exists in the customer's mind. This is entirely normal, legal, and the way virtually every clothing brand in the world operates. A good OEM manufacturer will produce custom woven neck labels in your brand name, care labels with your care instructions and country of origin, custom hang tags to your design, branded poly bags, and any additional retail packaging you specify.
Step 4: Find an OEM Manufacturer
Finding the right manufacturer is the most consequential decision you'll make as a brand founder. The wrong manufacturer costs you money, time, and reputation — through late deliveries, poor quality, incorrect specifications, and unresponsive communication. The right manufacturer becomes a genuine business partner who helps you grow.
Start with certifications. Any manufacturer you work with should hold ISO 9001:2015 (international quality management standard — the baseline for a professionally run factory), OEKO-TEX Standard 100 (confirms fabrics contain no harmful substances — required by many US and EU retailers and Amazon), and GRS 4.0 (Global Recycled Standard, if sustainability is part of your brand positioning). Alibaba Verified Supplier status adds an additional layer of accountability for factories on that platform. BSCI or Sedex audits cover ethical labor practices — increasingly required by large retail buyers.
Where to find manufacturers: Alibaba is the most accessible starting point — filter for Verified Gold Suppliers with high transaction volume and read recent reviews carefully. Trade shows like ISPO Munich, Magic Las Vegas, and A+A Dusseldorf attract manufacturers looking for international buyers and allow you to see samples and meet people face-to-face. Industry referrals from brand owner communities (Facebook groups for clothing brands, Reddit communities) are highly valuable because you're getting real experience rather than sales pitch. Direct Google search for "OEM apparel manufacturer Sialkot Pakistan" will surface factory websites and Alibaba profiles. Trade associations like PRGMEA (Pakistan Readymade Garments Manufacturers and Exporters Association) maintain directories of verified members.
Red flags to avoid: no facility photos or video walk-through, refusal to sign an NDA before reviewing your designs, inability to provide client references, quoted MOQ that seems suspiciously low without explanation, very low prices that suggest you're dealing with a trading company (not a factory), slow response times, and no clearly defined sample process. A good manufacturer answers your questions clearly, sends sample photos proactively, and treats a 10-piece order with the same professionalism as a 10,000-piece order.
Looking for an OEM Manufacturer?
Al Wahab Global is an ISO 9001:2015 and OEKO-TEX certified OEM manufacturer in Sialkot, Pakistan. MOQ 10 pieces, DDP worldwide. We sign NDAs before reviewing any customer designs. Get a free quote today.
Step 5: Write (or Get Help With) a Tech Pack
A tech pack — short for technical package — is the document you send your manufacturer that specifies everything about your garment. It's the single most important document in the production process. Without a detailed tech pack, your manufacturer is guessing at details you care about, and the sampling rounds multiply as a result. Every revision cycle costs time and money, so investing in a clear tech pack upfront is one of the highest-return activities you can do.
A complete tech pack includes: flat sketches of the garment (front, back, and any close-up detail views) with key measurements annotated; a measurement specification table listing all graded sizes (XS through 3XL or your size range) with tolerances; fabric specifications including fiber content (e.g., 80% polyester / 20% spandex), weight in GSM, finish (brushed, coated, bonded), and if possible a Pantone color reference; trim details covering zippers (brand, size, color), buttons, drawcords, aglets, elastics, ribbing, and thread colors; a label specification showing placement of neck label, care label, and any additional labels; and packaging instructions covering folding method, polybag specifications, and carton requirements.
For simple products, many new brands start with a reference sample — a garment they already own that they want replicated with modifications — rather than a full tech pack. This is acceptable for a first sample, and a good manufacturer will measure your reference sample and build a working tech pack from it during the sampling process. Free tools for creating basic tech packs include Canva (for laying out flat sketches you've hand-drawn or traced), Illustrator templates available on Etsy and Creative Market, and specialized apps like Techpacker and SpecDriven. For complex garments, hiring a freelance fashion designer with tech pack experience (Upwork, Fiverr Pro) for $200-500 per style is a worthwhile investment.
Tech pack creation: the blueprint that guides every production run and eliminates costly sampling mistakes.
Step 6: Order Samples
Samples are non-negotiable. No matter how clearly written your tech pack is, garments involve physical materials with real-world properties that can only be evaluated by holding them. A fabric that looks correct on a specification sheet may feel cheap, pill quickly, or lose its shape after washing. A measurement that reads correctly in a table may produce a silhouette that doesn't flatter the body. You cannot know these things from paperwork alone.
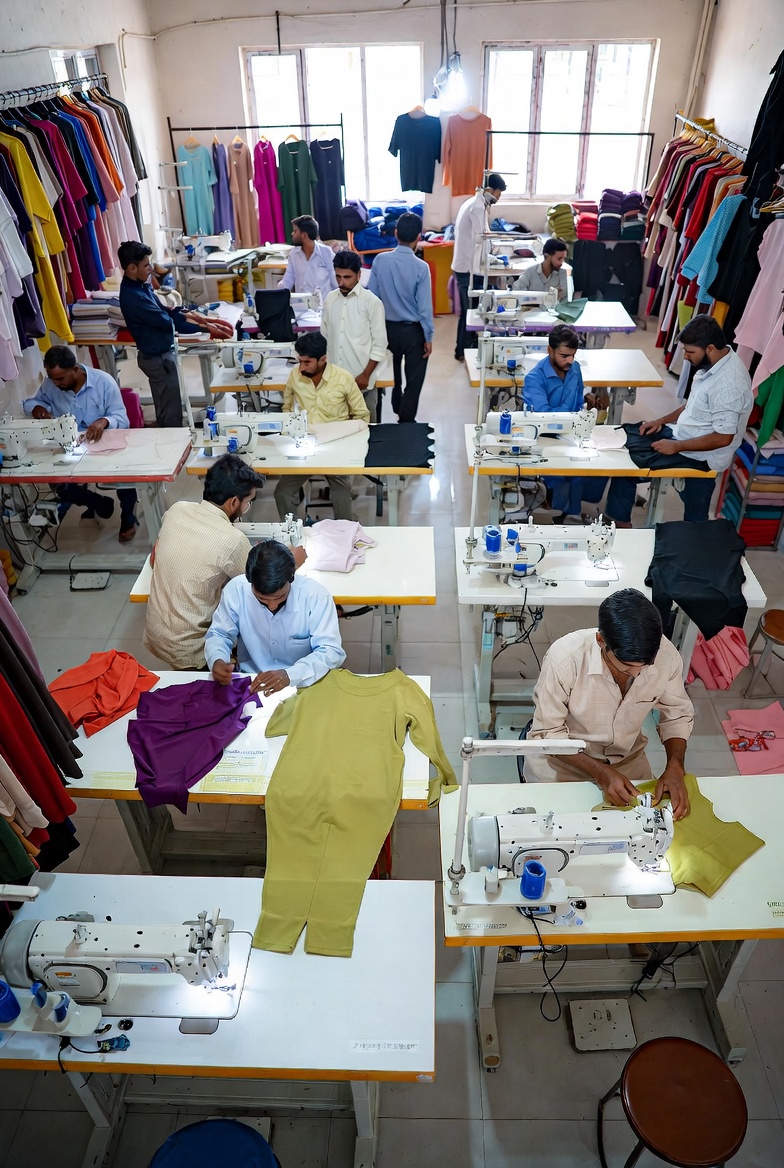
Sample costs at Al Wahab Global typically range from $30 to $150 per style depending on complexity — a basic t-shirt is at the lower end; a technical jacket with multiple panels and hardware is at the higher end. This cost is credited to your bulk order once you confirm production. The timeline for sampling is 7 to 10 business days from confirmation of your tech pack and payment of the sample fee. More complex styles or heavy detail revision requests may take 12-15 business days.
When your sample arrives, evaluate it methodically. First, check measurements against your spec sheet with a measuring tape — lay the garment flat and measure chest width, body length, sleeve length, shoulder width, and any other critical dimensions. Industry standard tolerance is ±1cm. Next, assess fabric quality: does the hand feel match your expectations? Does the weight feel appropriate for the price point? Stretch the fabric — does it recover fully? Check stitch quality: are stitches even and consistent? Are seams flat without puckering? Check label placement against your spec, and color accuracy against your Pantone reference or reference fabric if provided. One to two rounds of revision is normal for a well-specified garment. Three or more rounds usually indicates a communication problem worth addressing directly.
Step 7: Set Up Private Label Branding
Your branding is what transforms a garment into a product that customers feel proud to wear and share. The physical elements of your brand — labels, hang tags, packaging — signal quality and attention to detail at every touch point. These details matter more than most founders expect when they're starting out. When a customer opens your package and sees a premium woven label, a thoughtfully designed hang tag, and neat retail packaging, it communicates that your brand is serious.
The three main label types each have different trade-offs. Woven labels are the premium standard — your brand name, logo, and size are woven into the label fabric using specialized looms. They last the lifetime of the garment, never fade, and feel high-end. Setup requires an artwork file (usually vector format) and a minimum of around 100-200 labels for the loom setup. The labels themselves cost $0.10-0.30 each in quantity. Heat-transfer labels are printed and heat-applied, with no minimum and very fast turnaround — ideal for low MOQ orders or size run variations. They're less premium feeling but increasingly common in performance activewear brands. Printed labels are the most basic option — screen or digitally printed on fabric or satin ribbon. Cost-effective but the least durable.
Your hang tag is your brand's business card. Design it to communicate your brand story and key product information: brand name, size, price, QR code linking to your website or care instructions, and whatever brand copy you want. Use 350-400gsm cardstock for a quality feel. Your poly bags should include a suffocation warning (required by law in many markets, including the USA) and can be printed with your logo for a branded unboxing experience. If you're targeting premium retail or Amazon brand registry, custom printed boxes add significant perceived value. All of these are coordinated as part of your production order with Al Wahab Global.

Private label branding: woven labels, hang tags, and retail-ready packaging — your brand identity brought to life.
Step 8: Place Your First Production Order
Once you've approved your sample and finalized your branding, it's time to place a bulk production order. Before you do, make sure your purchase order document is complete and explicit. A good PO includes: product name and style code, quantity breakdown by size and colorway, unit price and total order value, payment terms and schedule, expected delivery date, packaging specifications, label specifications with approved artwork files attached, and a reference to the approved sample. Never place a production order verbally or through a casual WhatsApp message — everything should be documented.
Standard payment terms in the apparel OEM industry are 50% deposit before production begins and 50% balance payment before shipment. This protects both parties — the manufacturer needs working capital to purchase fabric and pay labor, and you retain leverage until you've approved pre-shipment inspection. Be wary of any manufacturer asking for 100% payment upfront from a new customer relationship. Similarly, 100% payment on delivery is unusual for factory-direct orders. The 50/50 split is the industry standard for a reason.
During production, a well-run factory will conduct inline QC checks at key stages: after cutting (verifying measurements), after initial sewing (checking construction), and at final inspection (checking finished garments against your approved sample). At Al Wahab Global, we follow AQL 2.5 standard — the internationally recognized Acceptable Quality Level for apparel, which allows for a statistically calculated minor defect rate while flagging major defects for re-work. Before your balance payment is requested, we send pre-shipment QC photos showing finished, packaged garments alongside your approved sample for direct comparison.
Pro tip: Always request pre-shipment QC photos before making your final payment. A reputable manufacturer will send these as a standard part of the process — they show garments packaged and ready to ship, confirming spec and quantity before your money moves. If a manufacturer resists this, treat it as a serious red flag.
Step 9: Handle Shipping & Import
Understanding your shipping options will save you significant money and time. The two key terms are FOB (Free on Board) and DDP (Delivered Duty Paid). FOB means the manufacturer loads your goods onto the shipping vessel at the origin port, and you take responsibility from there — you arrange ocean freight, insurance, customs clearance at your destination, and last-mile delivery. FOB is typically cheaper per unit, but requires you to work with a freight forwarder and a customs broker, manage multiple documents, and understand import duty codes.
DDP means the manufacturer handles everything — international shipping, export documentation, import customs clearance, duty payment, and delivery to your door or specified warehouse. You pay one price and receive your goods. For first orders and founders who don't yet have a freight forwarder relationship, DDP is almost always the better choice. The simplicity is worth the slightly higher cost per unit. Al Wahab Global offers DDP shipping to 30+ countries including the USA, UK, Germany, France, Australia, Canada, and the UAE.
For Amazon FBA specifically, we ship directly to your designated FBA fulfillment center following Amazon's inbound requirements: FNSKU barcodes applied to each unit, polybag specifications per Amazon's category requirements, and carton labeling with Amazon's FBA shipment IDs. This eliminates the need for a domestic FBA prep center, saving you $0.50-1.50 per unit in prep fees and 1-3 weeks of transit time. Typical express DDP shipping times from Sialkot to US/UK addresses are 12-18 days. Sea freight LCL (less than container load) takes 25-35 days and is cost-effective for larger orders (typically 300+ units). Key shipping documents you'll receive: commercial invoice, packing list, airway bill or bill of lading, and certificate of origin (used for GSP duty reduction programs in eligible markets).
Step 10: Launch & Scale
You have your product. You have your branding. Now it's time to sell. The most common mistake at this stage is waiting for a "perfect launch" — the right audience size, the right marketing assets, the right season. Done is better than perfect. Start with a small initial order (your MOQ) specifically to validate that real customers will pay your target price for your product. If you can sell 10 units to people who aren't your friends and family, you have proof of concept. Then scale.
Pre-launch social media is your biggest leverage point before your stock arrives. Document your production journey on Instagram and TikTok — photos of your samples, fabric swatches, label proofs, and production updates. This content is genuinely interesting to potential customers and builds anticipation. A small but engaged audience of 500-1,000 followers who have been following your journey from day one will drive more reliable opening sales than a cold audience of 10,000 who've never seen your brand before. Use a pre-launch waiting list to capture emails.
On pricing: for direct-to-consumer, a 3x markup on your total landed cost (DDP unit cost plus any prep or platform fees) is the standard starting point. If your hoodie costs $18 DDP to your door, retailing at $54 is your baseline. Premium brands command 4-5x. For wholesale (selling to boutiques or sports clubs), 2x landed cost gives you room for the retailer's own markup (typically another 2x). Re-order timing is critical — don't wait until you've sold out. When you're at 20% of your starting inventory, place your next order. Production takes 2-4 weeks; you don't want to be out of stock during peak demand. As your volumes grow, discuss tiered pricing with your manufacturer — ordering 100 pieces instead of 10 typically reduces unit cost by 20-30%; at 500 pieces you may see 35-45% reduction from the MOQ price. Your manufacturer is invested in your growth and will work with you on pricing as volumes increase.
Frequently Asked Questions
How much does it cost to start a clothing brand?
How many pieces do I need to start?
Do I need a tech pack to order samples?
How long does manufacturing take in Pakistan?
What is MOQ and can it be negotiated?
Can I get my own labels and packaging?
Do you ship directly to Amazon FBA?

Bilal has helped 500+ brands launch from Sialkot, Pakistan to markets across the USA, UK, Europe, and Australia. He writes about OEM manufacturing, brand building, and the global apparel supply chain.